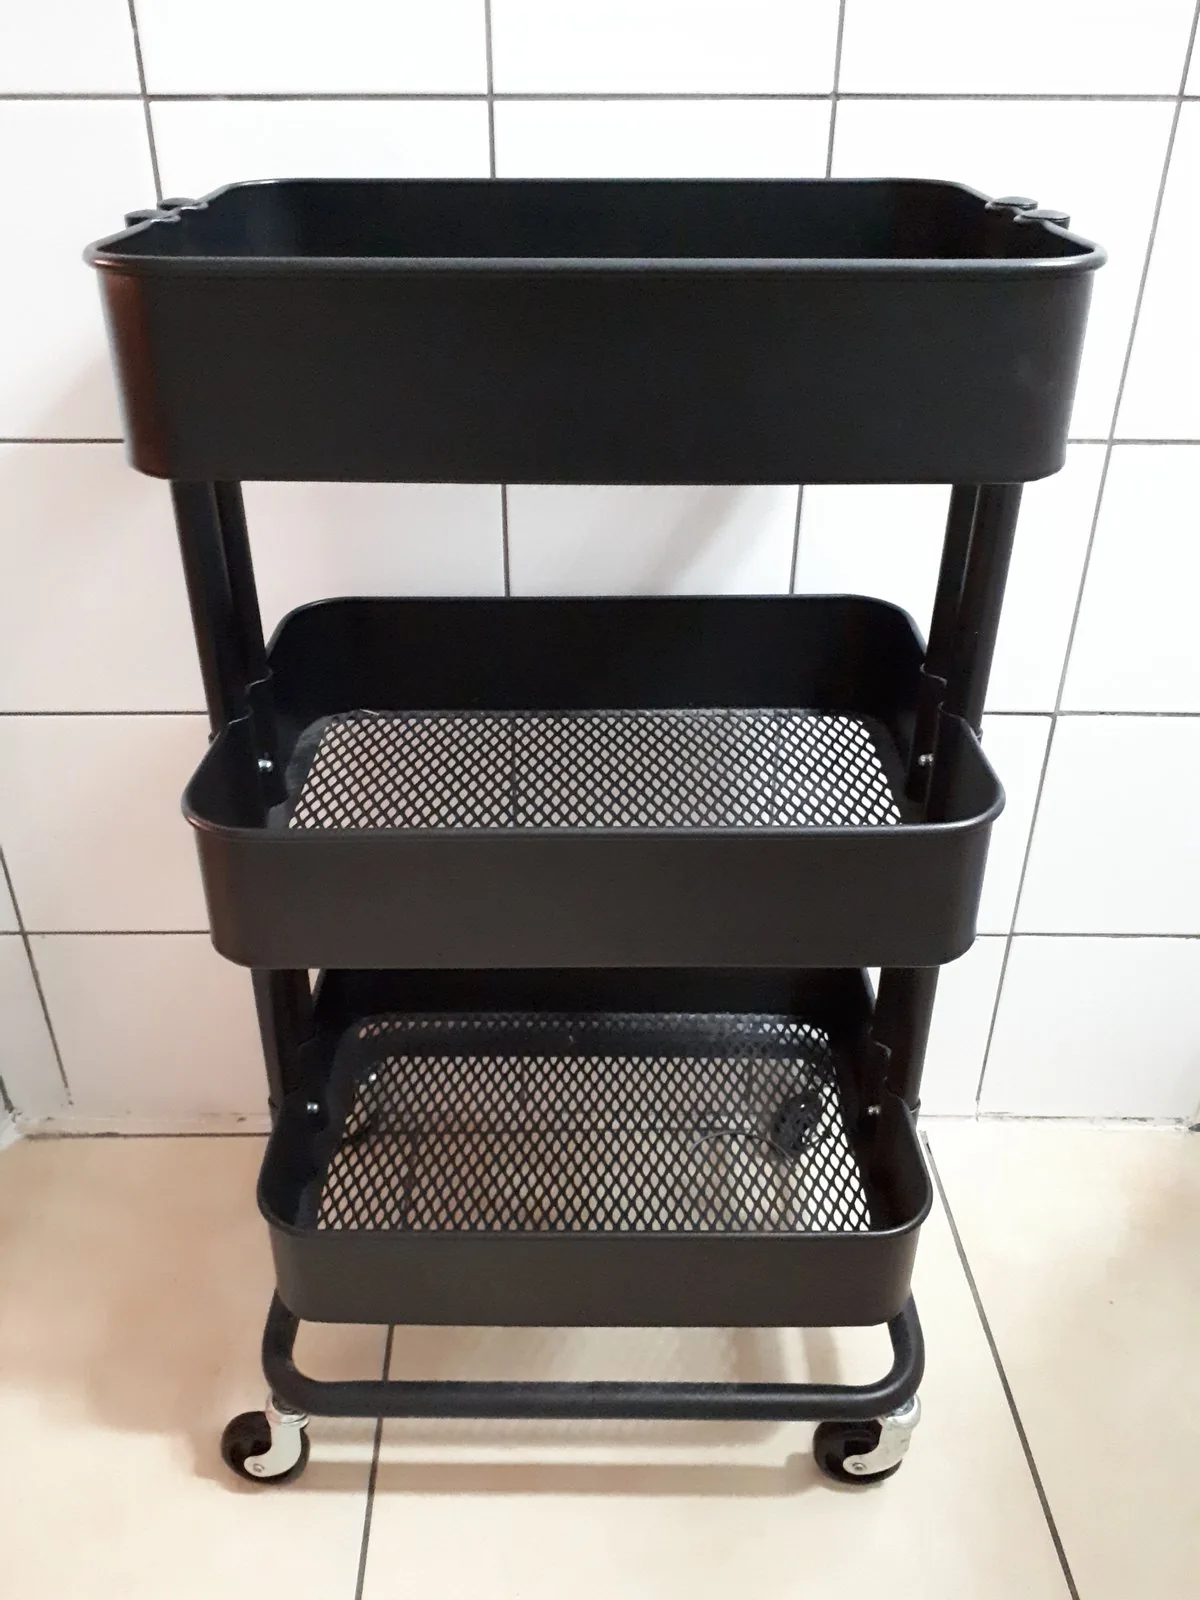
The rolling cart might be the most useful object in a small rental kitchen. It's a pantry, a prep station, a coffee bar, and a serving trolley — on wheels, requiring zero installation, and it moves with you to the next apartment.
I've owned three. Here's everything I've learned about choosing the right one and the 14 ways to actually use it.
Choosing the right cart
- Size: measure your gap first. Slim carts (around 15 inches wide) slide beside fridges; standard carts need a real corner.
- Tiers: three tiers is the sweet spot. Two feels limiting; four gets wobbly.
- Wheels: locking casters are non-negotiable — otherwise your pantry rolls away mid-cooking.
- Material: metal is sturdier and easier to wipe clean; wood looks nicer in living spaces.
14 ways to use it
As a pantry
1. The dry-goods pantry. Dedicate tiers to breakfast, snacks, and baking. Label each tier. This is the number-one use for pantry-less kitchens.
2. The can and jar station. Heavy items go on the bottom tier (stability!), lighter goods up top.
3. The overflow pantry. Bulk buys live here instead of colonizing your counters — the Costco run has a home now.
As a work station
4. Extra prep space. Top the cart with a cutting board and you've added two square feet of counter. Roll it to wherever you're working.
5. The baking station. Flour, sugar, mixing bowls, and tools on one cart that rolls to the counter on baking day and away after.
6. The coffee/tea bar. Maker on top, mugs on hooks on the side, supplies below. A café corner that needs no counter space.
As specialized storage
7. Produce cart. Onions, potatoes, and fruit in ventilated baskets on the tiers — better airflow than a dark cabinet.
8. Spice and oil cart. Park it next to the stove while cooking, roll it away after. Everything within reach, nothing permanent.
9. Small-appliance garage. The air fryer, blender, and food processor live on the cart in a closet or corner, rolling out only when needed.
10. Cleaning caddy. In a kitchen with no utility closet, a cart holds all cleaning supplies and rolls to wherever the mess is.
Beyond the kitchen
11. The bar cart. The classic — bottles below, glasses up top, and it rolls to the party.
12. Craft and wrapping station. Supplies sorted by tier, tucked in a closet until needed.
13. Bathroom overflow. When the kitchen finally gets organized enough to retire a cart, it makes an excellent bathroom or linen cart. They never go to waste.
14. The moving-day hero. On moving day, load the cart with essentials and roll it into the new place first. Instant functional kitchen while you unpack.
Making it look good, not cluttered
A cart becomes an eyesore when it's a random pile. Three rules: contain (bins and baskets on each tier, not loose items), label (so it stays organized), and edit (if a tier is overflowing, something needs a different home).
What NOT to put on a rolling cart
Carts have limits, and respecting them is what keeps yours useful instead of wobbly:
- Anything very heavy on top. Cast-iron Dutch ovens and full water jugs go on the bottom tier or not at all. Top-heavy carts tip — especially with kids or pets around.
- Unsealed liquids. A knocked-over open bottle of oil on a rolling cart is a disaster that rolls. Sealed containers only.
- Anything that needs a plug. Carts move; cords don't. Keep plugged-in appliances on stable counters, not on wheels.
- The "miscellaneous" tier. The moment one tier becomes "random stuff," the cart's system is dying. Every tier needs its labeled job.
Cart maintenance: 5 minutes a month
Once a month, wipe the tiers (kitchen carts collect sticky dust), check that the caster locks still engage, and tighten any wobbly screws. If a wheel starts sticking, a drop of cooking oil on the axle works in a pinch. A maintained cart lasts through many apartments — mine survived three moves and still rolls straight.
📌 Pin this for later
14 Rolling Cart Ideas for Small Kitchens — save it to your "Small Kitchen Organization" board.
Frequently asked questions
What size rolling cart fits in a small kitchen?
Measure your available gap first. Slim carts around 15 inches wide fit beside most fridges; standard carts (around 18 inches) need a dedicated corner. Don't forget to account for the handle and wheel clearance.
Are IKEA RÅSKOG carts worth it?
Yes — it's the benchmark for a reason: sturdy, affordable (around $30), easy to assemble, and endless accessories exist for it. Cheaper knockoffs often have wobblier wheels, which matters when the cart is loaded.
How do I stop my rolling cart from looking messy?
Use bins or baskets on each tier instead of loose items, label the tiers, and give the cart one defined job. A cart with a purpose looks intentional; a cart with random stuff looks like clutter on wheels.
Where do I put a rolling cart if I have zero floor space?
Look for the forgotten gaps: the 6-inch sliver beside the fridge fits a slim cart, a closet holds a cart that rolls out when needed, and in a studio the cart can double as a nightstand or side table. If truly no gap exists, a cart probably isn't your tool — try door organizers and wall hooks instead.
Metal or wood rolling cart — which is better for kitchens?
Metal for kitchens: it wipes clean, handles moisture, and the classic designs have the best accessories. Wood looks warmer and suits carts that live in living areas (bar carts, craft stations). For anything near food prep or the sink, metal wins.
How much should I spend on a rolling cart?
For kitchen duty, $25–$40 gets a sturdy 3-tier metal cart that lasts for years — the well-known flat-pack options sit right in this range. Below $20, check the wheel quality carefully; wobbly casters are the most common complaint with ultra-cheap carts.